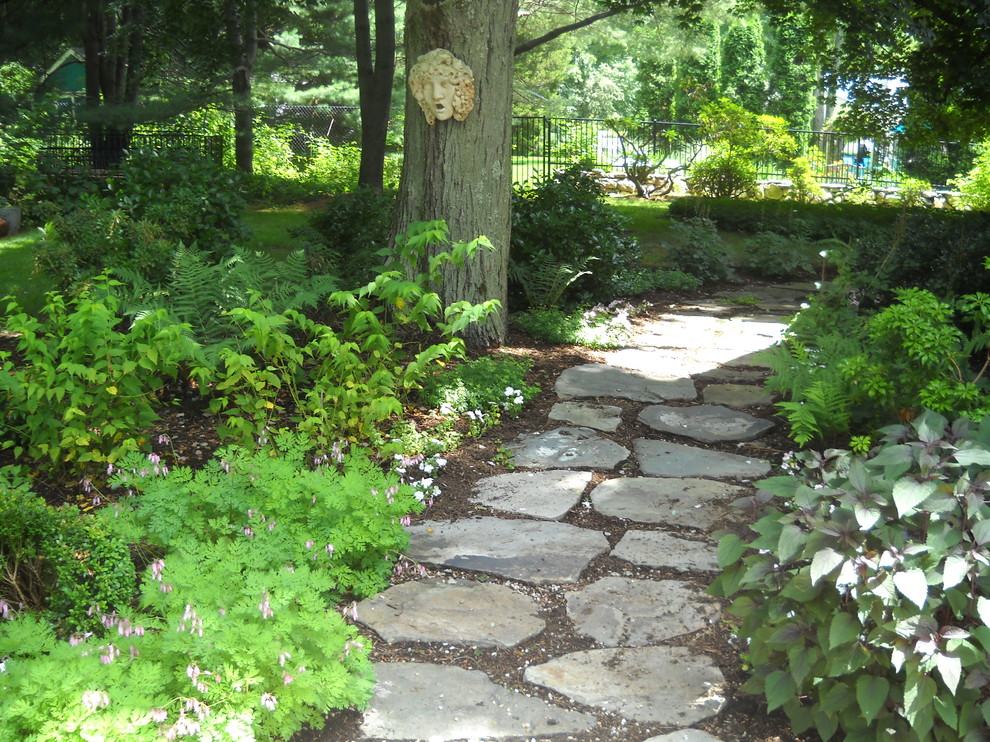
Create a Rustic Walkway with Native Stones

Texas Real Estate Agents, Austin Realtors, Central Texas Real Estate, Texas Real Estate Companies, Austin Real Estate Companies, Texas Real Estate Broker

Image by Nancy Buron from Pixabay

If you’re like many homeowners who prefer a natural landscape plan, your outdoor living space undoubtedly features lush vegetation and bright, blooming flowers. However, you might also have the sense that something is missing but can’t quite put your finger on what it might be. If this describes you, the missing element is probably hardscaping. Hardscaping refers to elements of landscaping that aren’t plants, such as water features, statuary, gazebos and garden paths.

At its best, hardscaping brings functionality to the table as well as enhances aesthetics. Few things do this better than a rustic stone walkway meandering over the property. Here’s how to make it happen yourself over the course of an average weekend.

Select Your Stones

Stones used for walkways should be flat, wide and thick enough to withstand foot traffic. Choosing stone that is found naturally in your area cuts down on retail and delivery costs. Avoid using polished stones because these present potential slip-and-fall issues due to their slick surfaces. Stones that are between two and three inches thick offer better stability than their thinner counterparts and often come with a more attractive price tag as well.

Lay Out Your Walkway

The first step is to determine your walkway. Avoid straight lines — stone walkaways are meant to meander. Garden hoses are ideal for marking garden paths that curve. Use a sod cutter and a flat spade to cut and remove the grass, and dig out the soil where you want to place the stones to about a depth of five inches and make sure it’s firmly tamped down before placing landscape fabric and adding a two-inch layer of sand over it.

After smoothing down the sand so it provides a flat surface, it’s time to lay down the stones. This part is a little like putting together a jigsaw puzzle, so take your time to figure out the placement. Be sure to use a carpenter’s level to make certain that the stones are at the same height, and add or remove sand as needed. However, if you live in an area that receives significant amounts of precipitation, slightly sloping the larger stones toward the outside of your walkaway helps prevent standing water issues.

Landscape the Walkway

Some people prefer the clean, austere aesthetic of pebble or oyster shell mulch in the gaps between the stones, while others like the rustic, tousled look provided by low-growing herbaceous plants. Corsican mint is an excellent choice because it has a bright green color all year round and releases a divine, minty aroma. Other choices include creeping thyme, rock cress, artemisia and sedum. You can also mix it up with a variety of ground covers for a classic, cottage garden look.
What you need to know about non load bearing walls

Texas Real Estate Agents, Austin Realtors, Central Texas Real Estate, Texas Real Estate Companies, Austin Real Estate Companies, Texas Real Estate Broker

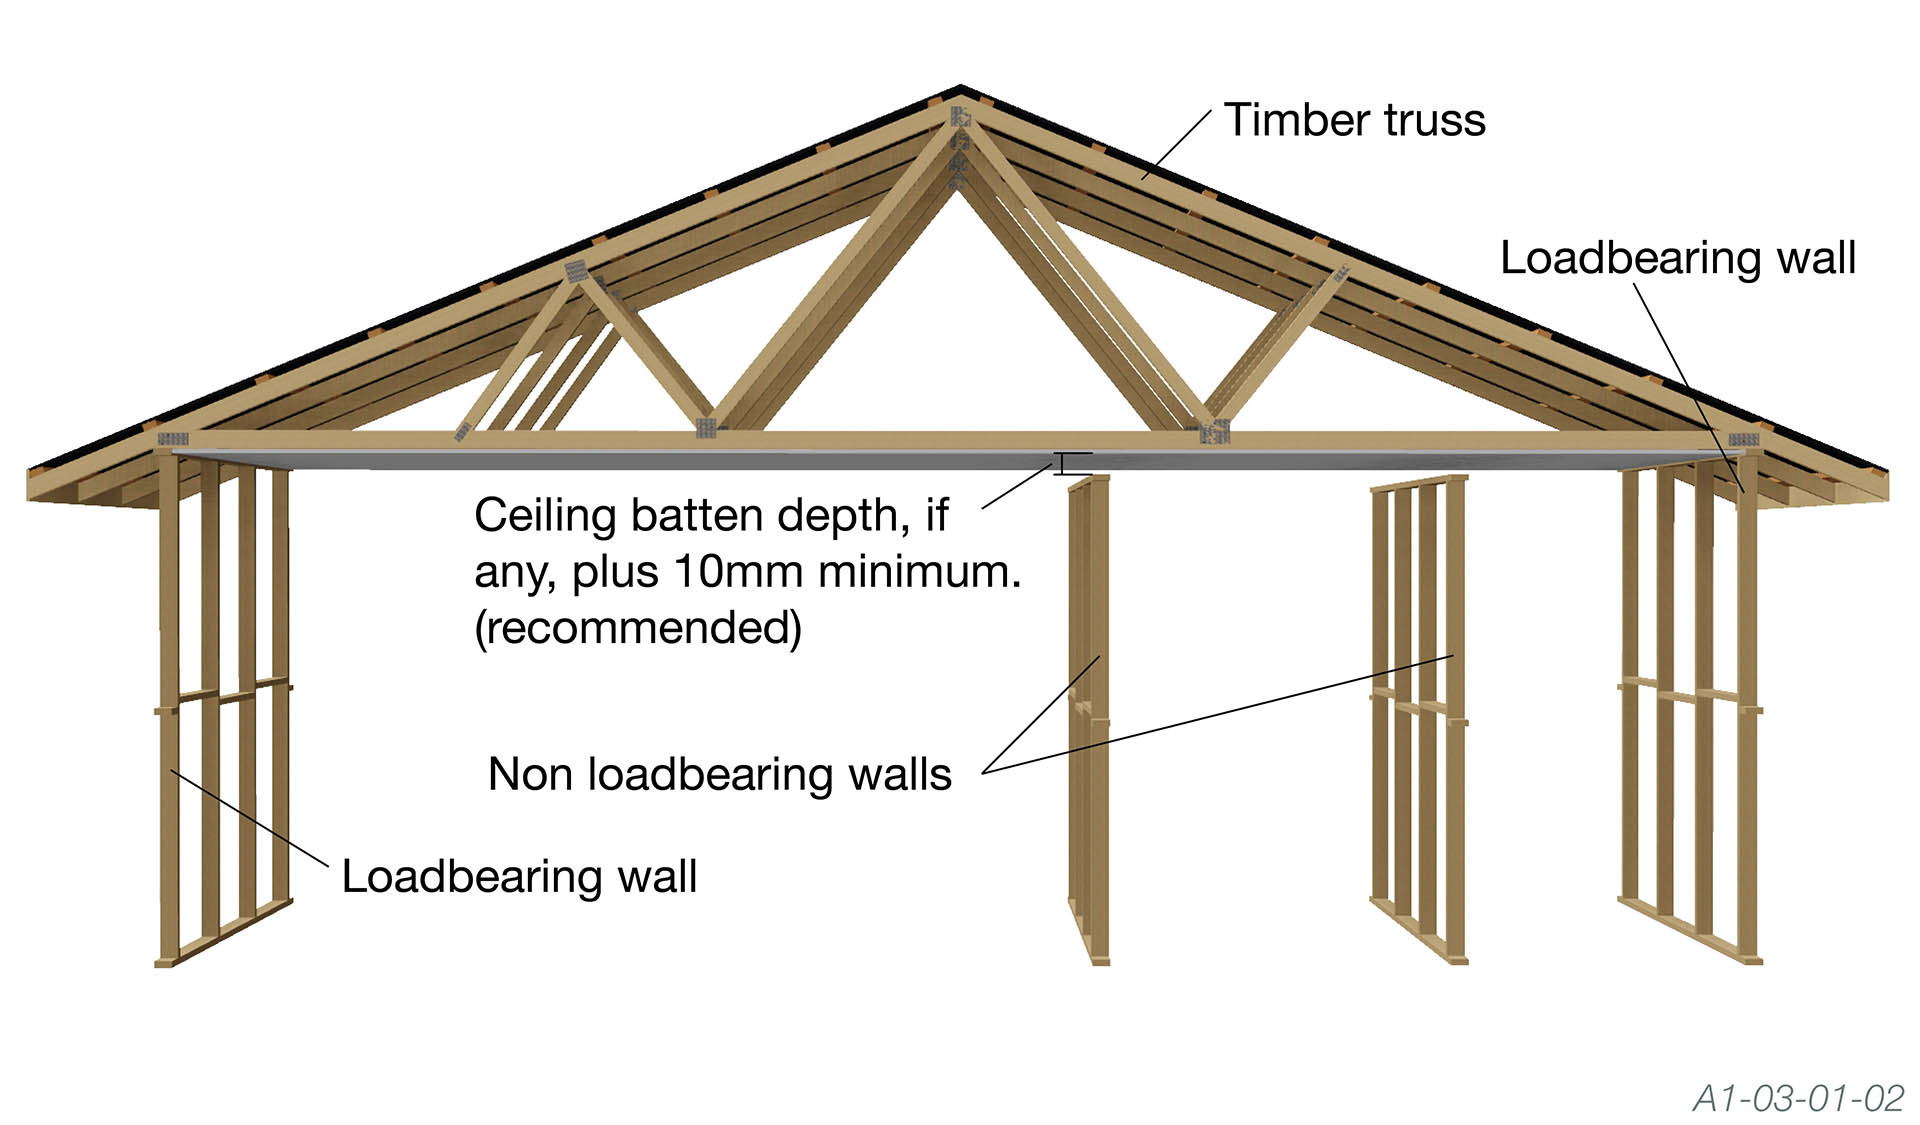
If you’re planning a major remodel of your home, you’ll need to know about safely removing non load bearing walls. Most interior walls you are likely to remove during a remodeling project are non load bearing, but it’s important to know how to identify them before you begin demolition.

As always with significant renovation projects, consult a professional before you get into your home renovation.

Here is a basic guide to non load bearing walls:

What are examples of non load bearing walls?

Walls in your home exist for many reasons other than bearing loads. Here are some examples of non load bearing walls you’re likely to have in your house:

  • Closet walls.
  • Interior basement walls.
  • Walls between bedrooms.
  • Angular walls covering corners.

What is the best way to remove a non load bearing wall?

While demolishing a wall might make you think of sledgehammers, it’s much safer and more effective to remove non load bearing walls piece by piece. The basic strategy for safely removing a non load bearing wall is to begin with the outside layers and work inward.

It may seem simple, but it’s essential to hire professional help for removing walls of any kind. Even if the wall is not load bearing, you will need to install headers to support the weight from above. Removing a wall also requires altering electrical circuits, plumbing or gas pipes and HVAC ductwork in a safe and precise manner. Pipes and wires will either need to be capped off or redirected.

For safety reasons, it’s recommended that you consult an engineer or other construction professional for help removing a non load bearing wall. They can make sure all changes adhere to building codes and will keep you and your home safe in the future.

Keep this in mind when planning a major remodel of your home, and plan accordingly, so you have the support you need.

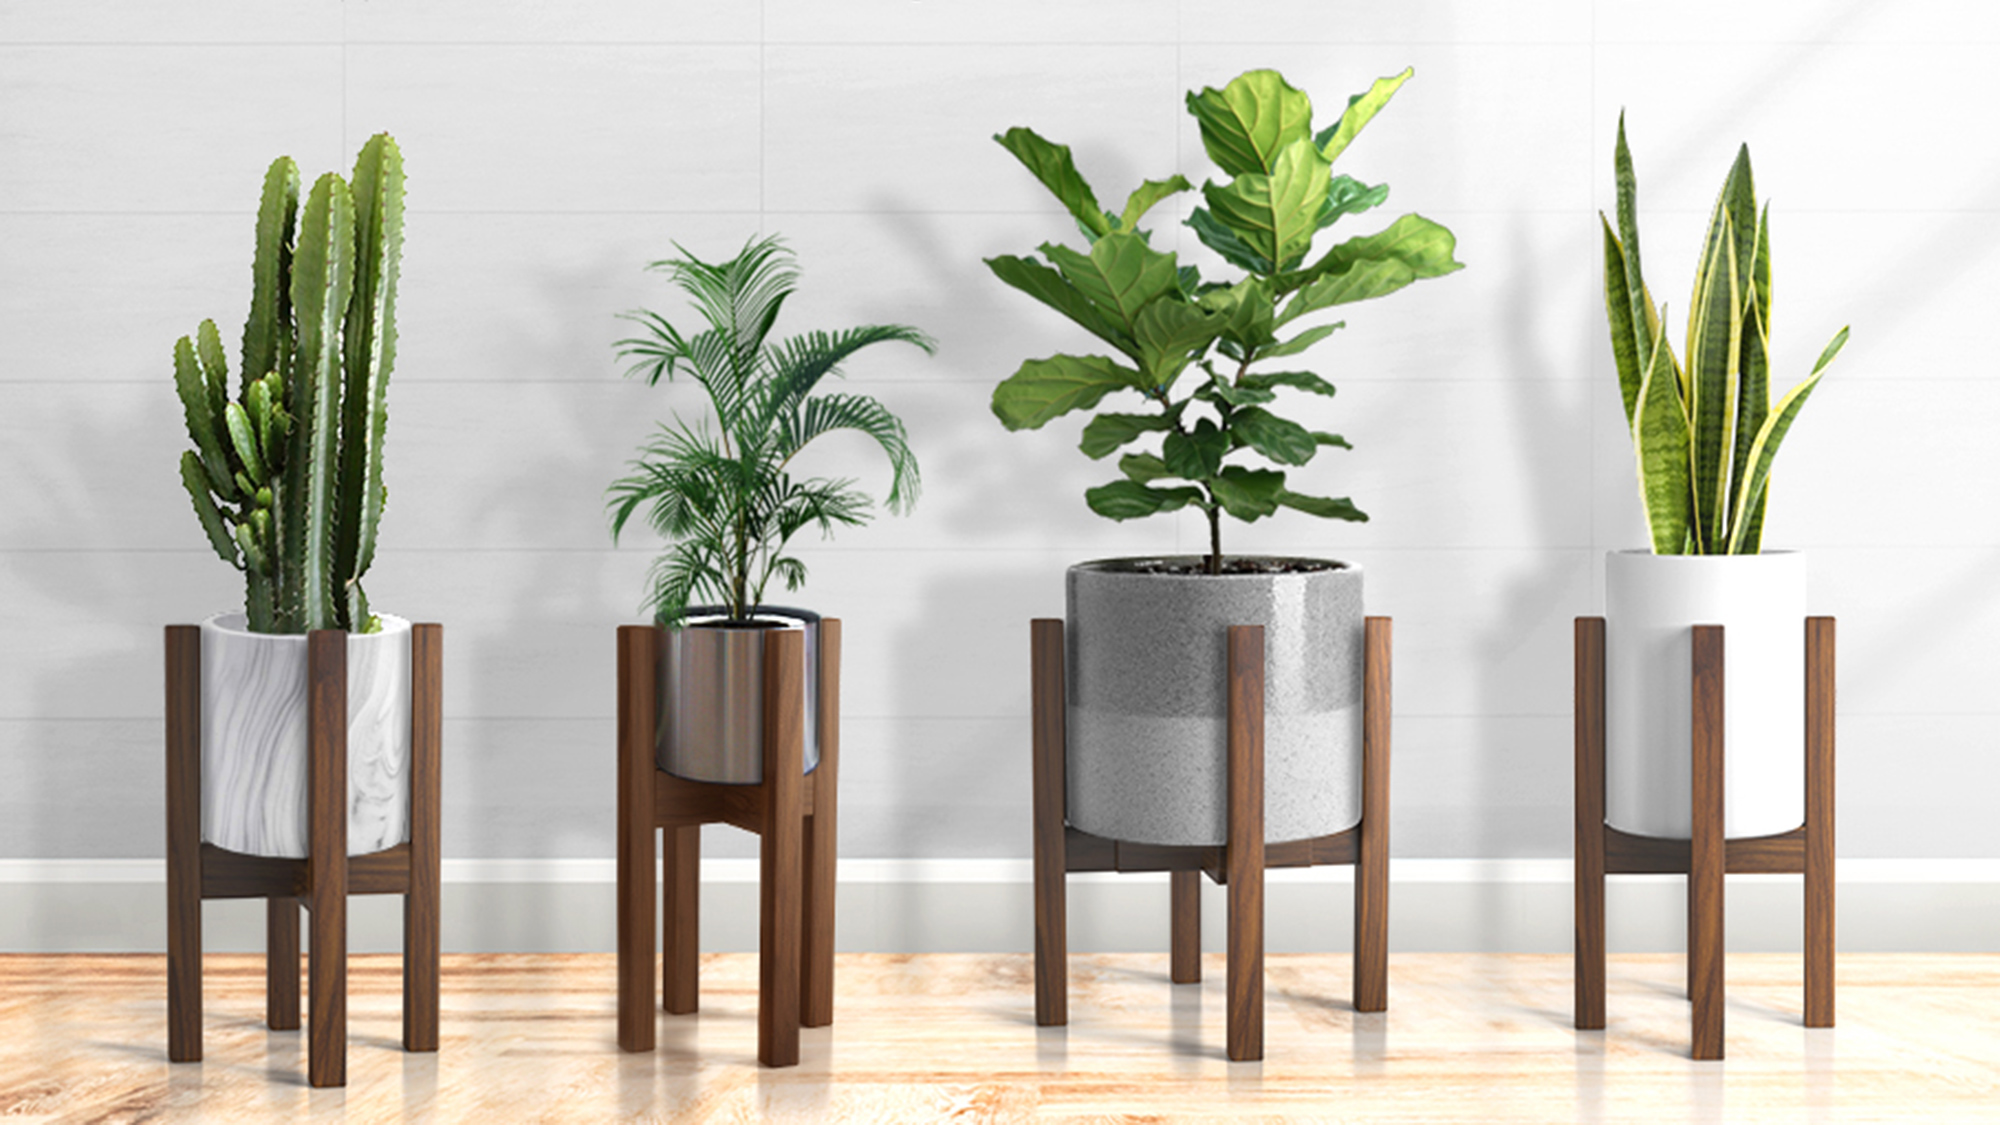
Craft Your Own Miniature Plant Stand With This DIY Guide

Texas Real Estate Agents, Austin Realtors, Central Texas Real Estate, Texas Real Estate Companies, Austin Real Estate Companies, Texas Real Estate Broker

Adding height variation to your plant collection can enhance the entire look of the collection. Even if you have your potted plants on a shelf, table or other surface off of the floor, some plants definitely benefit from sitting up higher. There are plenty of tabletop plant stands available on the market but they’re also easy to build yourself. Here are the materials and steps needed to make your very own miniature plant stands.

Materials & Tools

Square wood dowel
Dowel pins
Wood glue
Wood stain
Sealer
Rag
Plant pot
Measuring tape
Hand saw
Drill & drill bit
Sandpaper or power sander
Clamps

Process

  1. The very first thing you need to do is measure the diameter of the pot you want to use in the stand. If it’s a tapered or round shape, measure both the bottom and the widest point (whether at the top or in the middle).
  2. Measure and cut the wood dowel so that you have 4 “legs.” For the crosspieces, you’ll need one long piece and two smaller pieces to make the cross.
  3. Mark where the drill holes will go. Add drill holes to the center and either end of the crosspieces and into the middle of each side support. Make the holes approximately 1/2 inch deep.
  4. Use glue and dowels to connect the crosspieces. Add a bit of glue to the end of the dowel and fit it into each hole, clamping the pieces together to make sure it’s a firm fit. Once connected, you should have an X shape.
  5. Now add dowels into each end of the cross and secure them with glue. Attach the leg pieces by fitting the dowels into the holes you drilled in the center of each support. Use the clamp to hold everything steady while gluing.
  6. Make sure the glue is dry and check for any sign of wobbling. If you have some slight unevenness in the legs you can sand down the longest one or more to even them out. If there is a dramatic difference, you may need a hand or hack saw to correct it.
  7. Sand all the surfaces thoroughly to prepare for the stain or paint you want to use. Scrape off any extra dried glue you find, since it won’t take the stain or paint.
  8. Once you’re finished sanding and prepping, paint the visible surfaces and add a coat of seal afterward.
  9. Grab your plant pot and test out the stand. Check again for any signs of unevenness or wobbling and adjust accordingly. Experiment to find the best looking spot for your new tabletop plant stand to complement the plant itself as well as offer it the maximum light and air flow.

How To Avoid Problems With Your Hot Water Heater In Your Home

Texas Real Estate Agents, Austin Realtors, Central Texas Real Estate, Texas Real Estate Companies, Austin Real Estate Companies, Texas Real Estate Broker

You may not think much about your hot water heater. Unless of course, your hot water heater ends up breaking down. Hot water is so important in our homes, yet we take this resource for granted. Hot water does a lot in our homes from clean our laundry to disinfect our dishes to heat up our showers. We use it without thinking about it.  

If you neglect your hot water heater it can cause some costly damage to your home. Your basement could end up flooded. Pipes can burst. You can be without the use of hot water for days- even weeks- if you’re not vigilant about taking care of your hot water heater. 

Once water is gushing from the source, the best course of action is to simply shut the water off to your home. Before you even get to that point there are some tell tale signs of damage to your hot water heater that can be detected before major issues arise. First, if you notice any type of water around your hot water heater, you should get it checked out. Don’t look at it as “no big deal.” Any type of moisture or water stains around the water heater itself are a sure sign that something isn’t right with the unit.

As a homeowner, you should know just how old your hot water heater is. Usually, the installation date on the heater is noted somewhere along with the serial number. The typical hot water heater lasts about 9-11 years. If you live in an area with hard water, this number can vary.   

The Cleanup

Once the damage is done to your hot water heater you’ll likely have a large cleanup project on your hands. You’ll need to call water extraction services that will help dry out the area and clean up any baseboards that can become hazardous. Sometimes, these projects can get a bit bigger than you’d ever expect. After the water is pumped out, the cleanup has only just begun.  

Why Hot Water Heaters Fail

The minerals from water tend to build up (especially in the case of hard water) and cause the unit to rust out form the inside. While the inside of the tank contains glass, it does have metal pieces that can rust. You can replace certain parts of the hot water heater from time to time to keep it in good working order, the best prevention is to replace your water heater when the time is right. Don’t let the unit sit until way past its expiration date.

Being The Homeowner

As a homeowner, you probably wonder if something like a broken water heater were to happen if your insurance would cover the cost of the damage. The insurance will cover the cost of cleanup and repairs. The insurance will not cover the cost to replace the hot water heater or any labor costs. The only way the entire cost would be covered is if you have a home warranty. 

A simple thing that you can get to help alleviate major damage to your home from a hot water heater is to get an alarm. This little device is inexpensive and will alert you when any water hits near the areas of the alarm. This could save you a lot of costly damage and repairs. The most important thing that you can do in your home to prevent major damage from a hot water heater is to stay vigilant and keep on top of maintenance and replacement timelines.           

How to Set Realistic Expectations for the Homebuying Journey

Texas Real Estate Agents, Austin Realtors, Central Texas Real Estate, Texas Real Estate Companies, Austin Real Estate Companies, Texas Real Estate Broker

As a homebuyer, it is paramount to establish realistic expectations for the homebuying journey. That way, you can take a step-by-step approach to achieve various goals along this journey and acquire your ideal residence faster than ever before.
Setting realistic homebuying expectations can be simple. Now, let’s take a look at three tips to help you set realistic homebuying expectations.

1. Assess Your Home Must-Haves and Wants

Dozens of homes are available in cities and towns nationwide. If you establish realistic homebuying expectations, you may be better equipped than others to determine exactly what you want to find in your dream house. As a result, you could reap the benefits of a quick, seamless homebuying experience.

Oftentimes, it helps to create a list of home must-haves and wants prior to searching for a house. This list can be updated as you proceed along the homebuying journey and will serve as a guide to help you discover your ideal residence.

2. Get Pre-Approved for a Mortgage

With a mortgage in hand, you can narrow your home search to residences that fall within your price range. Then, you can speed up the homebuying journey and find your ideal residence in no time at all.

To get pre-approved for a mortgage, you’ll want to meet with banks and credit unions. These financial institutions generally offer a broad array of mortgage options. Examine all of your mortgage options closely, and you’re sure to find a mortgage that matches your finances.

Also, don’t hesitate to ask mortgage questions when you meet with potential lenders. Banks and credit unions employ friendly, knowledgeable mortgage specialists who are happy to help you in any way they can. Thus, you can gain expert insights from these mortgage specialists that could help you make an informed mortgage decision.

3. Collaborate with a Real Estate Agent

A real estate agent understands what it takes to purchase a home in any housing market. Therefore, he or she can help you prepare for the real estate market and establish realistic homebuying expectations from day one.

Typically, a real estate agent first will learn about your homebuying goals. He or she then will help you map out a successful homebuying journey, one that concludes with you discovering your dream house at a budget-friendly price.

A real estate agent offers plenty of support at each stage of the homebuying journey too. This housing market professional will set up home showings, keep you updated about new residences that become available and help you evaluate houses. And if you want to submit an offer on a home, a real estate agent will make it easy for you to put together a competitive homebuying proposal.

Achieving the optimal results during the homebuying journey sometimes can be difficult. But if you establish realistic homebuying expectations, you may be able to streamline the homebuying journey and ensure that you can purchase a great house that suits you perfectly.

4 Home renovations you might want to avoid

Texas Real Estate Agents, Austin Realtors, Central Texas Real Estate, Texas Real Estate Companies, Austin Real Estate Companies, Texas Real Estate Broker

Renovations can increase the value of your home. However, not every renovation project is a good investment. Unfortunately, many renovations can actually lower your home’s resale value and cost more than you bargained for. If you’re interested in renovating your home, make a note of these projects to avoid:

Too much texture

While texture on walls and ceilings can enhance the aesthetics of a house, it’s not always a good investment to add. Not only are highly textured ceiling and wall finishes often considered dated, they are extremely difficult to remove. To increase texture without hindering future offers, try experimenting with texture in your wall decor and furniture.

Full carpet

Hardwood floors are a well-known plus for potential homebuyers. Conversely, a home with too much carpet might receive fewer offers and lower appraisals. Carpet shows age and damage much easier than wood and laminate, and can also cause issues for those with pet or dust allergies. If you want to add new floors, experts recommend reducing the amount of carpet in your home rather than adding more.

Bold paint colors

Paint is not permanent, but dramatic colors on walls can be a turn-off to potential homebuyers. Color is highly subjective, making neutrals and shades of white a safer bet for a renovation project. Potential buyers would rather consider your home to be a blank canvas than a personalized work of art.

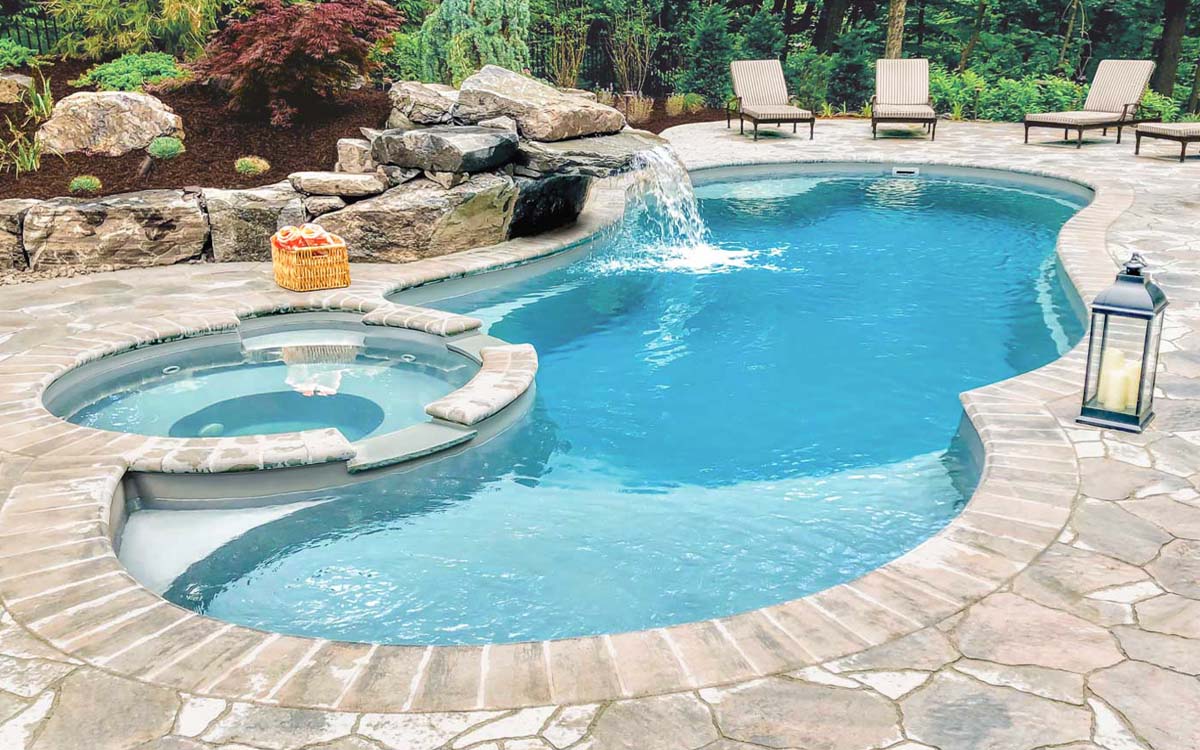
Swimming pools

Adding a swimming pool is not always a wise investment, according to real estate investment experts. Not only is installing a pool an expensive renovation process, the ongoing required maintenance can seem like a huge undertaking to potential buyers.

If you live somewhere with six months or more of hot weather during the year, a pool may be a smart project to invest in. However, it may be more beneficial to spend that money on a patio renovation or other outdoor upgrades instead.

Not every home renovation equals a return on investment. While customizing your home to meet your personal needs is an enormous advantage of homeownership, it’s also helpful to be mindful of the future. By knowing which projects to avoid, homeowners can enjoy their home while boosting property value.

Enjoy a Positive House Selling Experience

Texas Real Estate Agents, Austin Realtors, Central Texas Real Estate, Texas Real Estate Companies, Austin Real Estate Companies, Texas Real Estate Broker

Every home seller wants to enjoy a positive property selling experience. Yet ensuring your home selling strategy goes according to plan may be difficult, particularly for a seller who lacks property selling expertise. Lucky for you, we’re here to provide the help you need to achieve the optimal results at each stage of the home selling journey.
Now, let’s take a look at three tips to help you reap the benefits of a positive home selling experience.

1. Set an Aggressive Initial Home Asking Price

How you price your home will have a significant impact on how quickly your residence sells. If you establish an aggressive initial home asking price, you should have no trouble stirring up plenty of interest in your residence as soon as your home becomes available.

Check out the prices of available houses in your area that are similar to your own residence. Then, you can establish a price range for homes in your area and price your house accordingly.

Furthermore, it often helps to evaluate the prices of recently sold houses in your city or town. With this housing market data at your disposal, you can find out whether you’re getting ready to sell your home in a buyer’s or seller’s market.

2. Remove Clutter

Clutter is problematic, particularly for a home seller who wants to streamline the property selling cycle. Fortunately, home sellers who identify clutter now can eliminate this problem before they list their houses.

Antiques, paintings and other excess items inside your home should be removed. You can always rent a storage unit, which will enable you to keep these items safe until you sell your house. Or, you can host a yard sale or sell excess items online prior to listing your residence.

Don’t forget to remove lawn decorations and other clutter from outside your house as well. By doing so, you can instantly improve your house’s curb appeal and increase the likelihood of a fast, profitable home sale.

3. Consult with a Real Estate Agent

A real estate agent is prepared to do everything possible to ensure you can enjoy a positive house selling experience. In fact, this housing market professional will offer plenty of support at each stage of the home selling journey.

Usually, a real estate agent will meet with you before you list your house. He or she then will craft a home selling strategy designed to help you accomplish your home selling goals. Next, a real estate agent will promote your house to dozens of potential buyers, set up home showings and open house events and keep you up to date about any offers to purchase your residence. And if you decide to accept an homebuying proposal, a real estate agent will guide you through the home closing process.

Ready to reap the benefits of a positive home selling experience? Take advantage of the aforementioned tips, and you can seamlessly navigate the home selling journey.

Homeowners Can Save Big With DIY Kitchen Island Innovations

If the cost of renovations holds you back from realizing your desired living space, strategic do-it-yourself projects can save money and accelerate the process.

It’s essential to understand that not every handy homeowner possesses the DIY skills to orchestrate a complete makeover. However, basic understanding of how to measure and use tools allow everyday people to make substantial living space improvements. In fact, more than a few motivated people can create a DIY kitchen island. Given that the meal preparation area ranks among the more expensive to upgrade, a DIY kitchen island can be a game-changer in terms of enjoyment and investment.

Popular DIY Kitchen Island Innovations

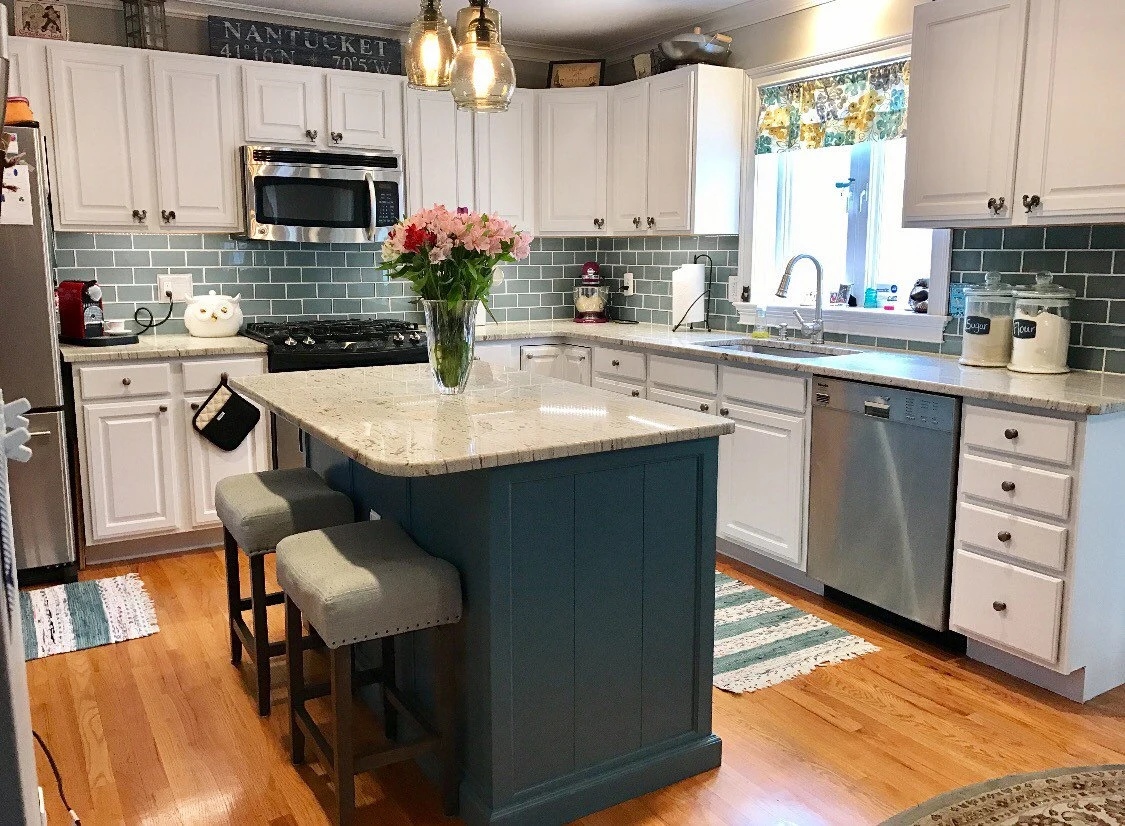
The kitchen has more foot traffic than any room in the household and that’s why many consider it the heart of the home. Perhaps the most dramatic change involves adding a DIY kitchen island. This asset allows family chefs expansive food preparation space and a place for friends and family members to gather over small meals and beverages. The following DIY kitchen island innovations illustrate ways you can save big while enhancing your home.

  • Farm Style Center Islands: One surprising innovation involves taking an outdated table or workbench and refurbishing it. Antiques often utilize sturdy hardwoods that can be sanded down, stained, and coated for kitchen use and fixed in place. These furniture items are usually created at the precise height of a modern center island and can be picked up at tag sales or junk stores for pennies on the dollar.
  • Dresser Updates: Like farm tables, a beat-up old dresser can form a DIY kitchen island’s foundation. Identify a piece of furniture that meets your desired height requirement. For instance, dressers of about 42 inches may accommodate bar stool seating. You can remove the top and craft a replacement that extends off one side for a seating countertop. It’s also perfectly acceptable to attach a more expansive countertop over the existing one. Given that repurposed furniture is inexpensive, you’re only paying retail for the countertop materials.
  • Rustic Built-It-Yourself: A DIY kitchen island does not necessarily require you to purchase a manufactured product. Fashioning a kitchen island remains remarkably similar to building a make-shift table or cabinet. Consider downloading basic table-making or cabinet plans and crafting one from lumber. Given that most homeowners are not finished carpenters, rustic designs and appearance can simplify the project.
  • Value of Shiplap: These interlocking boards rank among the more cost-effective home siding materials on the market. They are easy to manage and ideal for the exterior of a DIY kitchen island. This wood material can be installed on three sides of an island, leaving one side available for storage shelving. Shiplap provides aesthetically pleasing lines and can be painted or stained to suit. That makes it a cost-effective material to employ in a DIY kitchen island innovation.

Working families on strict budgets do not necessarily need to build up home improvement savings or leverage equity to enhance their living environment. By thinking outside the box and putting your creative spirit to work, it’s possible to make these DIY kitchen island innovations a reality.